Using Touch Screen
The HOME screen on the touch screen appears when the printer is turned on.
Touch the HOME screen on the touch screen with your finger tip to select a menu to perform settings.
HOME Screen
The HOME screen consists of the two screens.
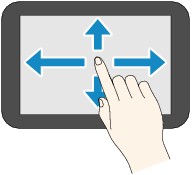
The screen can be switched by flicking left or right.
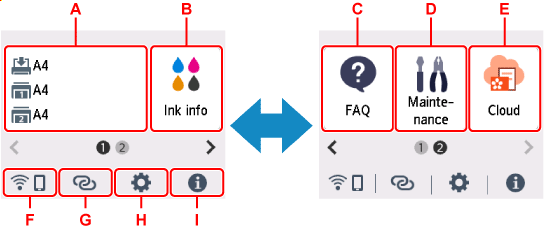
- A: Paper information
-
Register paper information for the rear tray and cassette.
- B: Ink information
-
Check the ink tank model numbers and other ink information.
- C: Troubleshooting
-
Displays details on how to solve common problems.
- D: Maintenance
-
Select to perform printer maintenance tasks.
- E: Cloud
-
Displays a menu of cloud functions.
- F: Network
-
Displays the current network status. Select to display the basic network information or to change the network settings.
The icon differs depending on the network of use or the network status.
 Wi-Fi is enabled and the printer is connected to the wireless router.
 Note
Note-
Depending on the signal state, the icon will change.
 (Signal strength: 81 % or more): You can use the printer over Wi-Fi without any problems.
 (Signal strength: 51 % or more): The problem such as the printer cannot print may occur according to the network status. We recommend placing the printer near the wireless router.
 (Signal strength: 50 % or less): The problem such as the printer cannot print may occur. Place the printer near the wireless router.
 Wi-Fi is enabled but the printer is not connected to the wireless router.
 Wireless Direct is enabled.
 Wi-Fi and Wireless Direct are disabled.
 -
- G: Wireless connect
-
Select to connect the printer to a smartphone/tablet over Wi-Fi through Easy wireless connect.
Tap this button to display a confirmation screen for starting a connection.
The printer has been already put into the standby mode for easy wireless connect and smartphone when a
 is displayed.
 - H: Setup
-
Displays the printer's setting menus or the maintenance menus.
 (NEW) appears when there is an information from PIXMA/MAXIFY Cloud Link.
 - I: Hint
-
Displays quick guides about such procedures as loading paper and troubleshooting and such information as estimated ink level and system information.
If you set Notification settings to Enable,
 (NEW) is displayed when notification is sent to Canon.
 Note
Note
-
For details on how to change settings, refer to Changing Settings from Operation Panel.
Basic Operation of the touch screen
Touch the touch screen lightly with your finger tip or move your finger to access various functions or settings.
 Important
-
When operating the touch screen, make sure to avoid the followings, which may cause the printer to malfunction or damage the printer.
-
Strongly pressing the touch screen.
-
Pressing the touch screen with other than your finger (especially with sharpened tips, such as on ballpoint pens, pencils, or nails).
-
Touching the touch screen with wet or dirty hands.
-
Placing any objects on the touch screen.
-
-
Do not attach a protective sheet on the touch screen. Removing it may damage the touch screen.
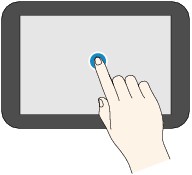
Tap
Touch lightly with your finger tip and immediately release.
Use to select an item or photo on the screen.
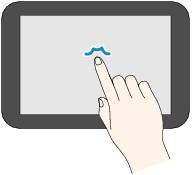
Touch
Touch lightly with your finger tip.
To move forward (or go back) menus or photos continuously, keep touching the forward (or back) mark.
Flick
Flick your finger on the screen up, down, left, or right.
Use to switch menus or move forward or backward through photos.
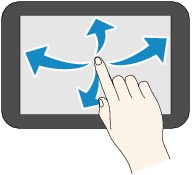
Drag
While lightly touching the screen, move your finger up, down, left, or right.
Use to view lists of items or move sliders.
